
Revolutionizing Repairs: Creating a Window Nut Fastener for Delica L400 with 3D Printing

As you know, the journey to create is rarely straight, and sometimes our projects are inspired by the most mundane yet practical needs. Today, we're going to take a look at one such need that sprouted from my own Delica L400. After a recent camping trip, I found myself in need of 2 window nut fasteners for the side windows. Instead of buying these, I thought, "Why not make it myself?" So, follow along as I go through my process of design and production.
Inspiration Behind The Project
In the bustling world of 3D printing, it's easy to get caught up in complex projects and lose sight of the practicality that this technology can bring. The beauty of having a 3D printer is that it allows us to become producers rather than consumers of items we regularly use. This project was born out of a simple need: I needed a window nut fastener for my Delica L400. Instead of ordering a replacement online, I saw an opportunity to create a custom solution.
Step-By-Step Design Process
The first step in the creation process was to take precise measurements of the existing window nut fastener. Accurate dimensions are crucial in 3D design, especially when creating a component that needs to fit perfectly into an existing system. This particular project doesn’t require extreme precision to function correctly as it is a fairly simple part. Keeping the aesthetics in line so that all of the parts look the same is one of the goals here.
I took measurements of the diameter of the top and bottom of the fastener as well as the height. I also measured the diameter of the opening in the window where the bolt enters. This is all that is needed to recreate this part.
Once the measurements were secured, I transferred them into Fusion 360, a versatile 3D design software. I sketched a circle with the bottom diameter onto the Z plane and then created an offset plane that is equal to the height of the fastener. I then made another sketch with a circle with the top diameter which shares the origin with the first circle as its center.


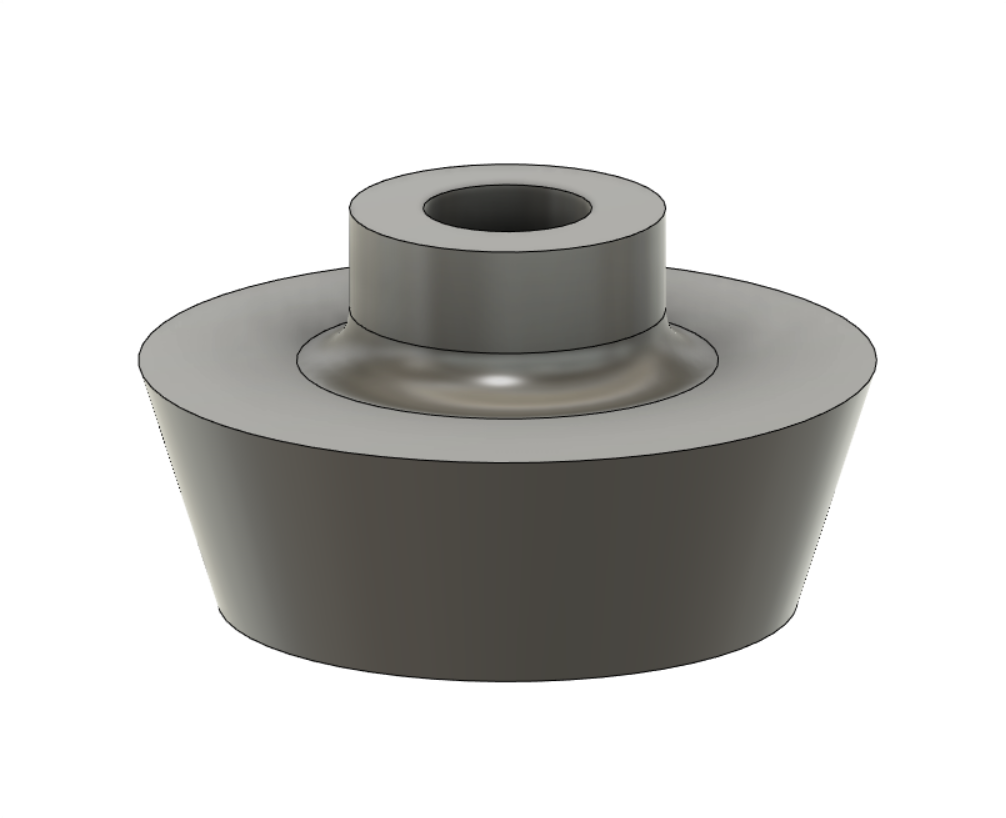
Next, a simple Loft function was used to connect the 2 circles together. This gives me the basic shape of the fastener.
I added an extrude to the bottom which extends the fastener through the opening in the window. This helps hold the window snugly and keeps the bolt from rubbing against the glass.


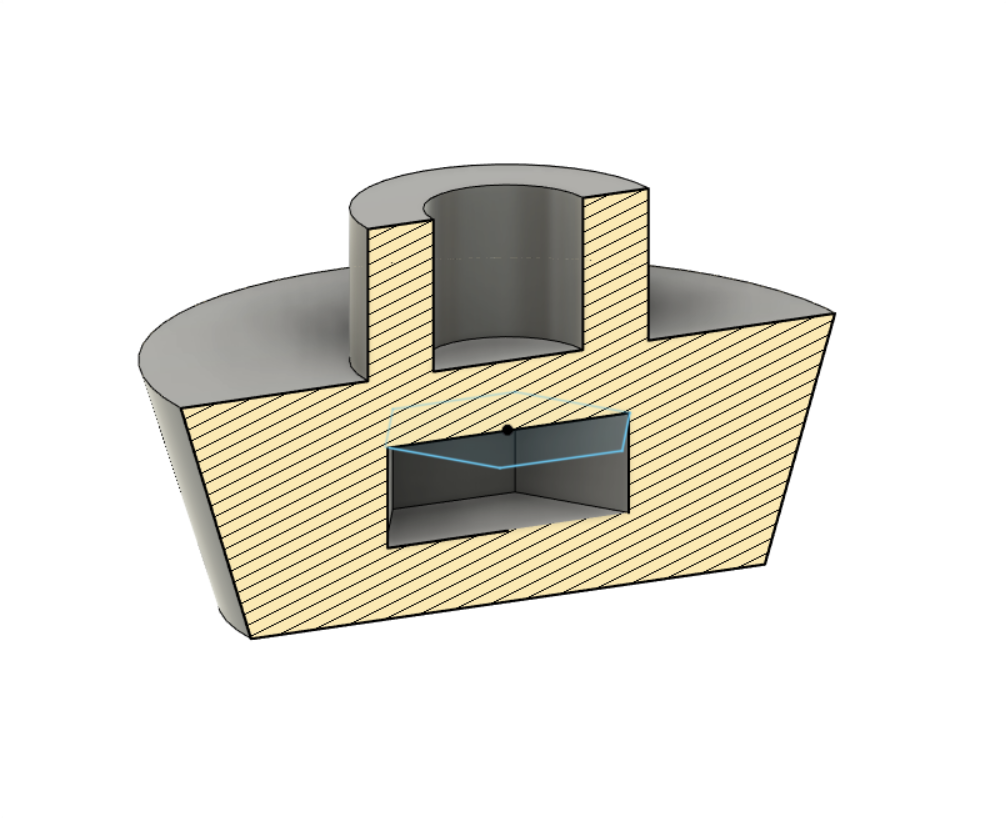
The original fasteners have a M5 nut that is fused inside the housing and this is something I wanted to recreate. Last year, I made my first version of this fastener and it required glue or epoxy to be used to hold the nut inside the housing. This time, I cut out an opening inside the fastener for the M5 nut and will use the pause-at-height function in my slicer to allow me to place the nut mid-print. This will make the part much stronger with no post-processing required.
To do this, I created an offset plane from the top of the piece. The distance = (total thickness - M5 nut thickness) / 2. This makes sure that the part thickness will be equal on both sides of the nut.
I then made a sketch on this plane, drawing the hexagon for the nut centered in the piece. After that, a simple extrude cut makes the opening.
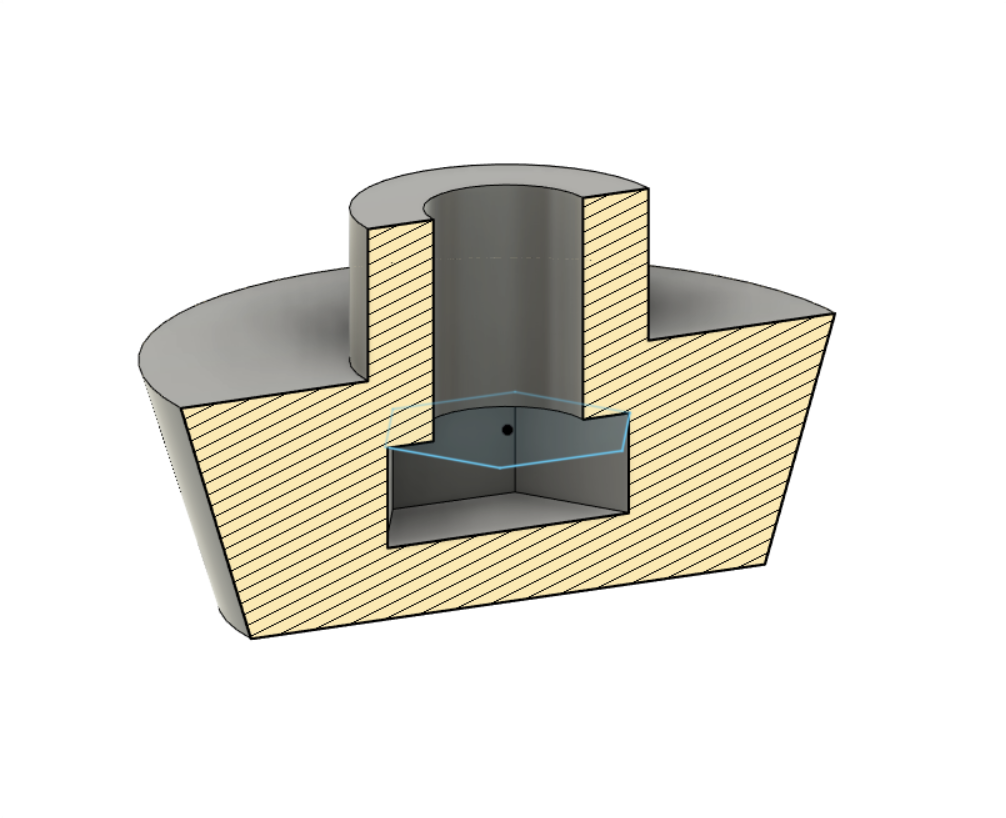
I made another extrude cut to extend the opening for the bolt down to the opening for the nut.
All that was left is to add a fillet which contributes to the strength of the piece.
I also created a washer to be used with the fastener. This will provide a snug fit and will help keep water from entering through the opening.


Crafting a component in Fusion 360 is relatively simple, but when you factor in 3D printing, the complexity heightens. You need to consider various aspects such as the direction of printing, potential overhangs, the necessity of supports, fillets, and any other element that could complicate the printing process or compromise the quality of the final product.

Download The Files
You can grab all of the files from my printables profile below:

3D Printing The Design
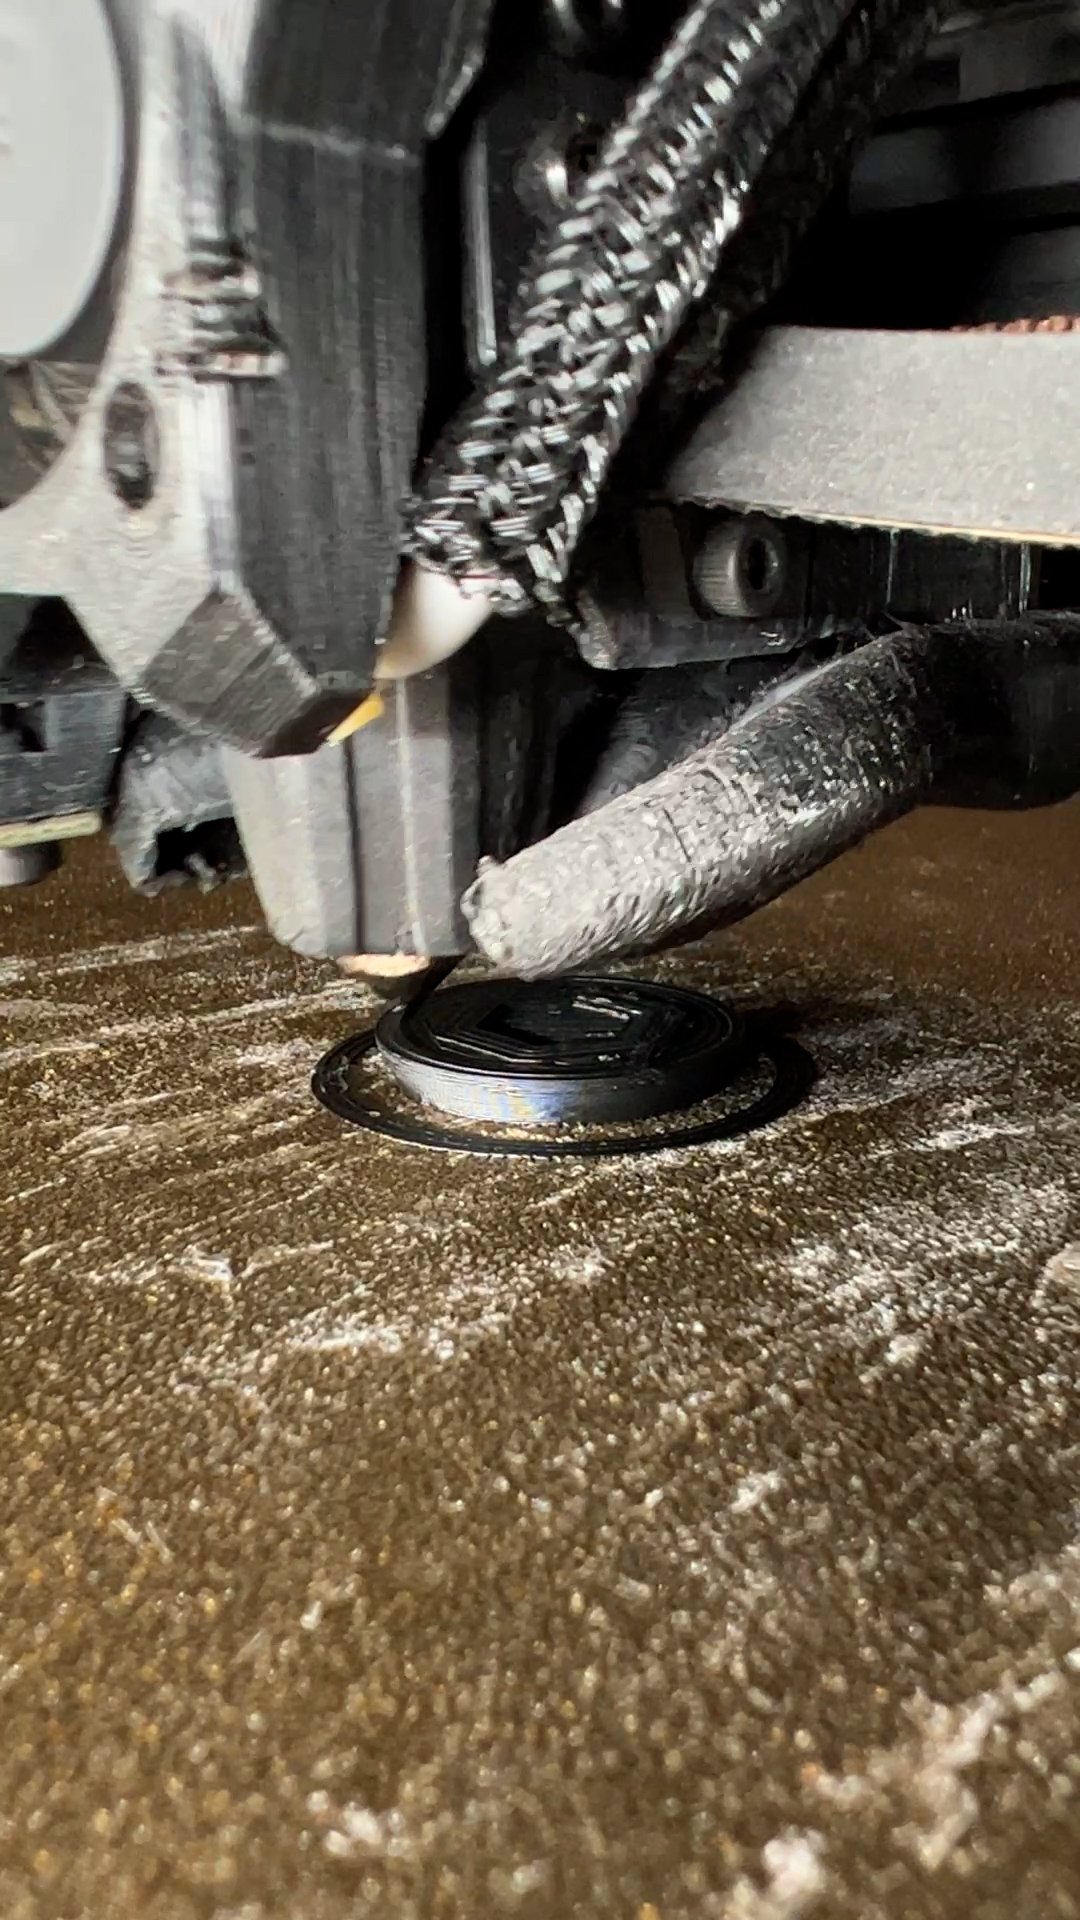
When it came time to print the design, I chose polycarbonate filament. Polycarbonate is known for its strength and durability, making it an excellent choice for a window nut fastener that would be subjected to regular use. It is also resistant to heat which is very important for a part that will spend all of its time in the sun. ASA would be another excellent choice for this part.
The washer is printed out of TPU, a flexible filament. It’s great for creating gaskets and seals and will be perfect for this application.
The slicer i’m using is Cura. There are many options out there for slicing your objects for your 3D printer, each having its own pros and cons. I’ve used Cura since the beginning of my 3D printing journey and always come back to it after trying alternatives. I don’t think any slicer is better than another, it’s all about what you like and feel comfortable with.
For the fastener, I used the pause-at-height function which can be found by selecting post-processing from the Extensions toolbar. You just have to switch to preview mode and move the slider up through the layers to see which layer comes after the opening for the M5 nut. You then input this layer into the pause-at-height and set the coordinates for the toolhead to move to during the pause. Once it pauses, you can place the nut and then hit Resume to finish the print.
If you are printing with a 0.2mm layer height, the pause is at layer 34.
To print the TPU washer, I used painter’s tape on the bed since I’ve never had much success with TPU sticking to my bed sheet without it. TPU takes a little practice to print with, you must have a good profile in your slicer and a decent direct-drive setup to be able to print it.
The total print time with filament changes is less than 20 minutes. I recommend always drying your filament before use, especially with Polycarbonate and TPU which is very hygroscopic.


BOM
3D printing opens up the potential for tailored solutions, exemplified by this window nut fastener project for the Delica L400. The technology’s capacity for transforming our lives extends from creating straightforward replacement parts to intricately complex designs. The capability of 3D printing is not just an idea, but a readily accessible tool for innovation and problem-solving.
Remember, the journey of creation is often just as important as the end product, and I hope this step-by-step guide has inspired you to tackle your own projects. Keep pushing boundaries, keep creating, and until next time, happy making!
Related Articles


Trending Articles


Latest Articles

Get an in-depth look at the QIDI Tech Q1 Pro in our detailed review. Find out how this desktop 3D printer delivers engineering-grade filament printing with unmatched precision, speed, and versatility.